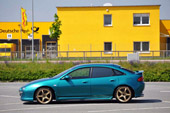
Ok I'll explain here how to convert your nasty looking drum breaks into sexy disc brakes.
First off, if you're not comfortable with replacing discs/pads, bleeding brakes, replacing shocks etc, give up now - you're messing with brakes here, they're pretty important - if they go wrong, you're stuffed. And so could someone else be!
There are two ways of doing the conversion. MX3 or V6.
MX3 requires the replacement of the lateral link bolts - the most difficult task known to man.
V6 requires an entire rear axle rather than just the hub carriers, but is a straight forward swap. This is what I did, and this is what I'm explaining here.
Tools and PartsV6 rear axle (crossmember, lateral links, hub carriers, anti-roll bar)
V6 rear brake calipers and carriers, and 4x copper crush washers, and 2x banjo bolts
V6 rear brake pads (best to get new ones)
Rear droplinks (yours will probably be rusted on, so you will have to cut them and fit new ones)
V6 handbrake cables (only the two rear parts, the front part is not necessary)
V6 ABS sensors and cables (these will probably be rusted into the hub carriers anyway. if your car doesn't have ABS, you don't need them, but they won't do any harm just sitting there)
17mm deep socket and breaker bar
12mm socket
10mm socket
17mm ring spanner
14mm ring spanner or socket for breaker bar
8mm ring spanner
10mm open ended spanner
14mm open ended spanner
12mm open ended spanner
4mm hex key
hacksaw
Hammer
Punch
32mm socket (for removing hub nuts)
Breaker bar extension (I used an old trailing arm, and it was tough, so the longer the better)
Angle grinder
Stanley knife/flat screwdriver
Jack
Pair of axle stands
Philips screwdriver
Any random M6 bolt (remove one from something useless under the bonnet if you have to)
Brake cleaner, 2 or 3 cans of it
Container (for catching brake fluid)
Fresh brake fluid, get a litre at least.
Scrap of 8mm rubber hose to plug brake hoses
Brake bleeding kit (rubber hose and a plastic bottle)
A person who can push a brake pedal
Soldering iron and solder, if you have ABS
Heatshrink or PVC tape, if you have ABS
Removing drummed rear axleBe prepared to sweat, bleed and swear for this whole process. First, remove the rear wheels and jack up the car. Place it on axle stands underneath the sills at the jacking points (don't use the rear axle, as you will be removing it

) See where my axle stand is placed here - there is obviously one in the same place on the other side


Put the car in 1st gear to stop it rolling away with no rear wheels on.
Next thing to do is remove the hubs from the axle. Put the handbrake on, then set about opening the drums. Unscrew the two screws on the face of the drum. You should see a bolt hole on the face of the drum - put your M6 bolt in there, and tighten it up. This will push the drum off the hub. Once it bites, turn it half a turn at a time, then tap the edges of the drum gently with a hammer. Eventually the face will become loose and you can just pull it off.
Ok, now go mental with the brake cleaner. You do not want to inhale or eat any of that brake dust, so clean as much out as you can.
Using a stanley knife or a flat screwdriver, you need to pry the hub cab off the end of the hub. This is the part that would normally be hiding the large gold nut in the picture above. It will be quite tough, so just work your way around. Let the handbrake off at this point - it makes it easier as you can rotate the hub while you pry it off, and you will need the handbrake off for the rest of the process anyway.
Once you've removed the hub cap, you should be greeted with a nice clean nut. This will be locked against the stub axle (you should see a notch in the axle, and the nut will have been dented into this notch to stop it turning). Get your 32mm socket on your breaker bar, and use whatever you can to extend the bar as long as possible. You need to undo this nut, and it will be tough. I used a spare V6 trailing arm - to give you an idea, the breaker bar here is 12" long -

Once the nut us loose, remove it. Then, simply pull the hub off the axle. You don't need any equipment, just grab it and pull, it shouldn't take much force. If it seems stuck, tap around the edge with a hammer to try and free it. It will come off.
Be careful not to damage the hubs or the nuts - you will be using these! Set them to one side once they're off.
Ok now is a good time to remove the droplinks. If they're new, undo them. If not, you will most likely need to cut them off. This should be obvious how its done - cut through the bolt and nothing else! DO NOT cut your anti roll bar. DO NOT cut your shock absorber. DO NOT cut your face. DO NOT cut your fuel lines. DO NOT pass go. DO NOT collect £200. Just grind off the nut, then use a hammer and possibly the punch to knock the rest of the droplink bolt out.
If your car has ABS, just snip the wires as close to the brakes as possible. Unless you have the full wiring and connector for your new sensors, then you can remove the boot trim, and the ABS cables plug in behind the side cushions next to the rear seats. There is a plastic bung/gromit which the wire goes through into the wheel arch - you can squeeze it and push it outwards from the inside. Saves you cutting and splicing if you have the complete cables, you can just unplug, then plug in the new ones

You also need to remove the handbrake cables from the drums. These are bolted in place with two 12mm bolts. Simply unbolt the bracket, then unhook the cable.
Next is to remove the trailing arms from the hub carriers. There is one 17mm bolt on the back of the hub carrier. This should be obvious, as it goes through the trailing arm and into the carrier. Undo it, remove the bolt and set it aside with the hubs and nuts. Once the bolt is removed, the trailing arm can be "pushed" off the spindle on the carrier. I just kicked the trailing arm towards the middle of the car and it popped right off
The rubber bushes on the other end mean it can move quite easily.
Ok next you want to remove the brake hoses. You can leave them on the drums, just undo them from the hard lines and unclip them from the shock absorber and the wheelarch. Be sure to save the clips! You will need a 12mm and 10mm open ended spanner to disconnect the hose. Brake fluid will leak out so it's worth putting a container underneath the hard line to catch it. Once you've removed the hose, your best option is to fit the new hose immediately. The hard line is not easy to bung up to stop the leak, so if you fit the new hose to it, you can use a bit of old rubber hose to bung up the banjo fitting on the end of the rubber hose.
Ok new brake hoses fitted and plugged, now you need to undo the six 14mm bolts holding the crossmember to the car. There are 3 on each side, all of which are easily seen from the wheelarch. You need to save these bolts! Remove 2 from each side, then remove the last ones carefully, as the crossmember will drop. DO NOT have anything important underneath the crossmember! Here you can see 3 bolts on one side which you need to remove. The one nearest to the camera, and the two near it. The other side is the same.

Ok now the crossmember is dangling from the hub carriers, you need to remove those too. If you have ABS, there is a 12mm bolt holding the ABS wire to the hub carrier and the shock. Undo this bolt. If you undo it without breaking it, I'll give you a bag of haribo. Next, undo the two 17mm bolts holding the shock to the carriers. You will probably need your breaker bar and an extension for this if it hasn't been done before. Be careful when removing the last bolt, as the carrier will easily just drop to the ground. You might have to lift the carrier to take the weight off the bolt when removing it. Just a warning, it's pretty heavy so be prepared!

Ok you should now have the complete axle off the car, and hopefully not crushing your hands/feet. Marvel at your success at getting to the 1/3 way point! I bet you can guess what's coming next...
Fitting the V6 axleYep, time to reverse everything you've just done, only with the V6 axle instead.
Place the axle under the car. First you should bolt the hub carriers to the shocks. Check for sheared bolts where the ABS brackets were on the V6 axle. If they stick out, you will struggle to fit the carriers into the shocks. Grab your grinder and grind off the excess. Or if you're lazy, grab your hammer and smash the excess until its flat. Either way works fine.
You might need to get someone else to hold the carriers in place while you bolt them to the shocks. Or you can do what I did and stack loads of crap up underneath the axle until it's held in place!
Once both carriers are bolted into the shocks, you need to bolt the crossmember onto the car. Use the 3 bolts you removed from your old axle and bolt it in place. Again you might need to get someone to lift it while you bolt it.
You should now have this:
Now you need to remove the 5-stud hubs from the newly fitted V6 axle. If the brakes are still on the axle, remove the caliper using the two bolts at the back. Note that when replacing pads, you undo one 12mm bolt and the caliper swings up. To remove the caliper, you don't touch this bolt - there are two bolts holding the caliper carrier onto the hub carrier - undo these and lift the caliper off, complete with it's carrier. It may be tough - you're not using the discs or pads so pry it off with something if necessary. Once the caliper is removed, the brake disc should just fall off, but probably won't so get your hammer and give it a patented Haynes "gentle tap". In English: whack it!
Remove the hub cap the same way you did before. Then remove the hub nut, and pull the hub off the axle.
You may as well fit your old hubs to the new axle now, so slide them on - doesn't matter which side is which and tighten up the nuts. You should use a torque wrench but I'm poor, so I just did them as tight as possible, with the extension on the breaker bar. Then use a hammer and a punch to lock the nuts in place, the same as they were before. Don't want the nut to work loose, then your wheel decide to fall off!
Result:

Bolt up the anti roll bar using your new droplinks.
Bolt up the trailing arms the same way they were before - just slide them onto the spindles and bolt them into place.
Swapping handbrake cablesThis is a ballache. The cables are bolted to the trailing arms, so you need to remove those bolts. You will need a 10 or 12mm socket, I forget which, as the trailing arm is U shaped, and the bolt sits in the bottom of the U shape, so no ring spanners here. If you're unlucky like me, the bolt will seize up half way out, then you will need to cut the rest off. You can just replace it with any 10 or 12mm M6 bolt when you fit the new cable.
Ok time to get under the car. The handbrake cables are also bolted to the floor of the car near the fuel tank. Follow the cables, you will see the brackets. Unbolt it. You may find your exhaust is in the way of the nearside cable - you can remove the exhaust if you wish, however I couldn't be bothered so I just pushed it out of the way.
Here's a pic of the bracket holding the handbrake cable under the car. The other side is the same, only with an exhaust pipe right in the way.

Ok you think that was annoying? The next bracket is ABOVE the exhaust in the middle of the car. Do you still have your middle heatshield? Even more annoying - you need to remove it as the bracket is behind it. It's held in place with 3 bolts (maybe 4, I forget, they're all easily visible though). Undo the bolts, then pull the heatshield out from behind the exhaust. You might have to bend it a bit to get it free but it will come out. Ok you should now see where the rear cables attach to the front cable. You need to disconnect them. Unclip the cables from the bracket, then unhook the cable. This sounds easy, but you do have an exhaust pipe in the way, so it may be a fiddle! Here's a pic of the clips holding the cable in the middle of the car - see where it is in relation to the middle silencer! There's normally a heatshield in the way here too, but I removed mine and didn't bother re-fitting it.

Take your new cables. They are different for each side (bracket faces the other way) but they can both fit each side. Attach them to the front cable as the old ones were, and clip them into place. Much easier said than done

Bolt the cables into place near the fuel tank. On one side, I forget which, there is another bracket in the way. The old handbrake cable bracket went between this and the car. There is also a notch on the car and a bent bit on the bracket to line it up. I cheated here, I bent the bracket back so I didn't have to bother with the notch, then just bolted the cable bracket on top. Simples
Now bolt the cables onto the trailing arms as the old ones were.
Don't hook the handbrake cables onto the calipers just yet.
Fitting the brakesThis can be the easy bit, but will probably be a pain in the butt. It may even involve a phone call to Marcrs where he threatens to lock Karissa in the kitchen!
Fit the MX3 discs onto your hubs. You can even screw them in if you want using the same screws that held the old drum in place.
Now bolt the caliper carrier onto the hub carrier, being careful not to gouge the disc with the brake piston or caliper.
Unbolt the 10 or 12mm bolt at the bottom of the caliper (holding it to the carrier), then swing the caliper upwards. Fit the pads into the caliper, then try and swing it back downwards. You will most probably find the pads are too close together, even when you pull them apart. If not, bolt the caliper back in place. If you do, remove the pads again, bolt the caliper back into place.
If you've found the pads too close together to fit over the disc, look at the back of the caliper. You should see two bolts holding the handbrake cable bracket in place. See pic - the closest bolt is the larger one, and holds the handbrake cable bracket onto the caliper. The furthest one is just a plug.
The larger one is structural, the smaller one is not. Undo the smaller one, and look into the hole - you will see a 4mm hex bolt. This is your manual adjustment gear. You need to turn this anti clockwise to pull the piston into the caliper. Turn the adjustment gear anti-clockwise a full turn, then try fitting the pads again. You will need to undo the bottom bolt again to swing the caliper up and fit the pads. If it still doesn't fit, keep the pads in place and turn the hex thingy another full turn. If after 5 or so turns, the pads don't seem to have moved at all, remove the pads from the caliper, slide the caliper off the carrier, place it on the floor, making sure it's not resting on anything like the fluid hole or the bleed nipple and give the piston a whack with a hammer. Refit the caliper and try fitting the pads again. You may need to turn the hex thing another 5 or so turns. If this still hasn't helped, check the condition of the teeth on the adjustment gear. To do this, remove the adjustment gear from the bolt hole - put the hex key in it, tilt it to get some grip on it, and pull it out, the adjustment gear should come out with the hex key. Check the condition of the teeth on the end of the gear. If they're rounded, you need to saw the rounded bits off using your hacksaw. Once that's done, clean up any burrs and put the adjustment gear back into the caliper and try again. While the gear is out, it might be worth blasting some brake cleaner into the adjustment gear hole. Use plenty!
Eventually the pads will fit over the disc and you can bolt the caliper back into place. Now, ensuring you can rotate the brake disc, turn the adjustment gear clockwise to push the piston back out again. Keep going until you can no longer turn the disc by hand. Once it binds like this, turn the adjustment gear a tiny amount anti clockwise until the disc spins again. Then put the bolt back in. This is how you adjust the handbrake at the calipers, should you need to do so in future.
Once that's done, you can hook up the handbrake cables - hook the ends of the cables over the levers (you might need to squeeze the levers by hand, or even unbolt them from the trailing arms first), then clip the cables into their brackets on the caliper.
Now bolt the brake hoses to the caliper. Remove the rubber hose you bunged the banjo fitting up with, then bolt it onto the hole on the caliper. Place a copper crush washer either side of the hose to ensure a good seal.
Wiring up ABS sensorsIf you don't have ABS, obviously you can skip this step.
You should have enough wire on the ABS sensors to remove an inch or so of the rubber sleeve, then strip half an inch of insulation from both wires inside. Do this on both sensors, and on both wires coming out of the car. You will notice that both wires are white - don't panic, it doesn't matter which way around they are spliced. Twist and solder the wires together. If you're not sure what I mean here, have someone else do this for you. I recommend you use some heatshrink tubing to cover the connections, or you can get away with some PVC tape. Heatshrink is the better option though.
Bleeding the brakesBy fitting new calipers and hoses, you have allowed air into the brake system. This MUST be removed before the car is driven as you may find the brake pedal has no effect at all!
Make sure you've fitted BOTH rear hoses, otherwise bleeding a caliper with the other one disconnected would be pointless.
Open the bonnet and check the brake fluid level. If you were quick enough plugging the new hoses, it shouldn't have fallen below the minimum. If it has, you will need to bleed all 4 calipers about 20 times each. If it hasn't you only need to bleed the rear calipers. Top up the brake fluid to the max, leaving the cap off. Starting with the rear left caliper, remove the rubber cap on the bleed nipple. Place an 8mm ring spanner onto it, then slip your rubber bleed hose over the nipple. Put the other end of this hose into the plastic bottle.
Undo the bleed nipple using your ring spanner, but do not remove it completely! Have someone press the brake pedal slowly to push the brake fluid out the bleed nipple. You may find nothing comes out the first time - this is normal, there is air inside the caliper and brake hose. I've found the best way to bleed them is to have the brakes pumped 3 times, then on the 4th time, hold the pedal down. The fluid should flow through the rubber hose and into the bottle. If you find fluid leaks out of the nipple, tighten it until this stops happening, but it still needs to flow through the nipple and into the bottle. After every other bleed, check the fluid level in the reservoir - if it's low, top it up. You do not want the level dropping below the Min mark. If it does, air will enter the master cylinder, then you will have to bleed ALL the fluid out of the system! The general process to bleeding a caliper is:
Undo bleed nipple
Pump pedal and hold
Tighten bleed nipple
Release pedal
Check fluid level in reservoir
Repeat that however many times you need to bleed the caliper.
Once you've bled the left caliper a few times, and are confident that the fluid is coming out with NO bubbles or rust, tighten the bleed nipple, remove your bleed kit and put the rubber cap back on the nipple. Then repeat the bleed process on the right caliper.
If the fluid drops below the min, at any point, you will have to get the whole car in the air and bleed every caliper 20 or 30 times, starting with rear left, then rear right, then front left, then front right.
Once you're done bleeding, put the cap back on the reservoir and start the engine. The brake pedal should feel just as good as before. If it feels spongy, you have air in the system and need to bleed all 4 brakes. If it's firm, you're all good. Pump the brakes a few times to ensure the pedal stays firm. Check the fluid level too, it should stay at the max. Keep the engine running, then check all the joins in the new hoses for leaks. If there are any, tighten them and bleed that caliper 3 or 4 times. Have someone press the pedal while you try and rotate the discs, just for your satisfaction that the brakes are working. Test the handbrake, to make sure the cable doesn't pull up too far.
Nearly done!Check every nut and bolt you've touched and make sure they're stupidly tight. Make sure hoses and ABS cables are clipped in the appropriate places. If you sheared the ABS bracket bolts, just cable tie the ABS cables to the shock. As long as they don't rub on the brakes or the wheels they will be fine. Replace the hub caps if you haven't already done so and fit the wheels back on. Apply the handbrake and lower the car.
Release the handbrake and push the car forwards. With it moving slowly, pull the handbrake and the car should instantly stop. If this works, your handbrake is working nicely.
Start the car, pull forwards SLOWLY and apply the brakes. If the car doesn't want to stop, apply the handbrake and bleed all calipers 20 or 30 times. You should be fine though, but ALWAYS test in controlled conditions
Bare in mind you have NEW brakes on the car now, so the pads and discs will need bedding in. Make sure the handbrake is pulled tight when parking!
After about 1000 miles of driving, it's worth adjusting the handbrake at the calipers to ensure the pads are still close to the disc.
Done!
I don't THINK I've missed anything here, but I'll have a read over it again and add anything I have missed. If anyone else finds anything I might have skipped/missed, let me know and I'll add it! Or if anything is unclear, just let me know
ABS errorsIf your car has ABS, you may notice the ABS warning light is on when you're done. Once you drive off, it should go out. If not, check you're splicing to make sure there are no shorts. Disconnecting the battery does not reset the ABS control unit, so will not clear the error - you need to drive the car to spin all 4 wheels for the ACU to get data from all the sensors to clear it.
If you cannot fix the ABS error, take it to a garage and have them look at it for you. The car is drivable with the ABS warning, however if you slam on the brakes, they will lock up.

 Login
Login Register
 FAQ
FAQ Search