It is currently Mon Aug 10, 2026 8:16 am

All times are UTC [ DST ]


Forum rules - Please read!


Remember to start your thread with the model of the car (BG, BA, BJ etc)

Explained in detail here


Post new topic Reply to topic  [ 412 posts ]  Go to page Previous  1, 2, 3, 4, 5 ... 14  Next
Author Message
Marc S
PostPosted: Tue Sep 23, 2014 1:10 pm 
UK Events Manager Offline
User avatar

My Car: 1st Gen RX7

Joined: Wed Mar 14, 2007 8:46 am
Posts: 13779
Location: "Rust?...I ain't got time to rust"
Reputation: 95

There's a few on the market, pretty sure Bilthamber do one - texture is just right. I'll have to try and find a can...

_________________
Image

Paragon Auto Finishing
Professional vehicle detailing & valeting, specialising in paint correction and enhancement
Servicing, repairs, and undersealing also available
Discounts available for Gold Members :)


Top
 Profile Facebook  
 
BRV-6
PostPosted: Tue Sep 23, 2014 4:22 pm 
Offline

Joined: Mon May 13, 2013 9:34 am
Posts: 807
Location: Staffordshire
Reputation: 14

Awesome work :shock: looking great, I'd like to see what route you take :D


Top
 Profile  
 
SerenaJ
PostPosted: Tue Sep 23, 2014 4:46 pm 
Moderator Offline
User avatar

My Car: BG GLXi, BA '97 GXi, '98 ZXi

Joined: Tue Mar 13, 2012 2:12 am
Posts: 1644
Location: Reading
Reputation: 14

Cheers Baz! :D Still the other side to do yet, but it's not half as bad. That first side was giving me nightmares so I did it first. Such a relief it wasn't as bad as I thought it might be and everything still seems to be solid.

Marc S wrote:
There's a few on the market, pretty sure Bilthamber do one - texture is just right. I'll have to try and find a can...


Thanks Marc, be great to know which one. Just browsing their website - top stuff. Might get some
cavity wax and spray that into the sills via the flute attachment holes before I put the new bungs in :)

S

_________________
"Never tell me the odds!"

"I'm gonna need a bigger drive"

Image

'Butch' maint thread (BA 2.0 V6 ZXi SE). Daily. PM me for V6 Whatsapp Group
'Sundance' maint thread (BA 1.5 GXi). Having surgery
'The Bug' (BG 1.6GLXi). Lodger


Top
 Profile  
 
BRV-6
PostPosted: Tue Sep 23, 2014 5:14 pm 
Offline

Joined: Mon May 13, 2013 9:34 am
Posts: 807
Location: Staffordshire
Reputation: 14

Sound, always a nice relief when its not as bad as it looks. :D

The other side should be a doddle then :lol:

Just welded my first ever sill.... on my mates KA :roll:

Might just Vaseline the hell out of mine just for winter :oops:


Top
 Profile  
 
Marc S
PostPosted: Wed Sep 24, 2014 1:08 pm 
UK Events Manager Offline
User avatar

My Car: 1st Gen RX7

Joined: Wed Mar 14, 2007 8:46 am
Posts: 13779
Location: "Rust?...I ain't got time to rust"
Reputation: 95

yes, go for the cavity wax, it's excellent stuff...in fact, all the bilthamber stuff is great, rust treatment is bang on too :)

_________________
Image

Paragon Auto Finishing
Professional vehicle detailing & valeting, specialising in paint correction and enhancement
Servicing, repairs, and undersealing also available
Discounts available for Gold Members :)


Top
 Profile Facebook  
 
SerenaJ
PostPosted: Sun Sep 28, 2014 7:40 pm 
Moderator Offline
User avatar

My Car: BG GLXi, BA '97 GXi, '98 ZXi

Joined: Tue Mar 13, 2012 2:12 am
Posts: 1644
Location: Reading
Reputation: 14

Warm & dry afternoon (how many of them left before winter? :( ), so de-rusted a few inches of rear passenger wheel arch: surface rust was starting to get a hold, glad I attacked that now before it became serious or made worse by all that salt they'll chuck on the roads up here. Felt along arches again and both absolutely solid, just that surface stuff 8)

Also re-de-rusted some of the driver's side sill I already did a couple of weeks ago, as slight surface rust coming back in some places - which I expected, to be honest. Used Hammerite "rust beater" this time, as I already had half a tin and I used it on the passenger sill months ago and it's done a grand job. Nasty brown colour all over my sills, but heck, if it keeps the car from disintegrating until I can repaint it nicely...!

Also got rid of the last of the Mazda factory electrical tape from the cabling and spare connectors in the engine bay. Re-done with new red tape, and will cover that with cable braiding (got a silver/red theme going on the car now, to match the silver paint/rear red light strip combo).

While I was there I covered the open connector ends with a square of polythene and taped them up to protect them. No idea what any of them are for; probably options I'll never put on the car, but you never know.

Image

Image

I can't believe how slapdash the factory were: wires visible everywhere stuck into those ridiculously huge connectors, bundles of cables roughly taped together against the side of the bay. Unused connector ends not even sealed off against dirt, just a piece of tape over the end! Awful job. Amazed they lasted so long.

S

_________________
"Never tell me the odds!"

"I'm gonna need a bigger drive"

Image

'Butch' maint thread (BA 2.0 V6 ZXi SE). Daily. PM me for V6 Whatsapp Group
'Sundance' maint thread (BA 1.5 GXi). Having surgery
'The Bug' (BG 1.6GLXi). Lodger


Last edited by SerenaJ on Sat Feb 24, 2018 10:50 pm, edited 2 times in total.

Top
 Profile  
 
smurf182
PostPosted: Sun Sep 28, 2014 7:45 pm 
Gold Member Offline
User avatar

My Car: BA 1.5 Intrigue 'Womble'

Joined: Sat Jul 21, 2012 3:47 pm
Posts: 1929
Location: Redcar, Cleveland
Reputation: 20

looking good Serena :), and i see she has a name now too 8)
thats a job i keep meanin g to do yet never ever seem to remember to do it while im in and around the bay

_________________
https://imgur.com/aENfa44 Smurf182


Top
 Profile  
 
SerenaJ
PostPosted: Sun Sep 28, 2014 8:01 pm 
Moderator Offline
User avatar

My Car: BG GLXi, BA '97 GXi, '98 ZXi

Joined: Tue Mar 13, 2012 2:12 am
Posts: 1644
Location: Reading
Reputation: 14

Cheers :D

Quote:
thats a job i keep meanin g to do


It did take a while: all the old tape was sticky and fragile, and I had to be really careful not to cut any wires when I was snipping off the tape.

I'm still toying with the idea of cutting off all the unused connectors and sealing off the unused wires permanently, but I need to check if any of them are for foglights first. I've not absolutely ruled out fitting some in the future, even though I'm keeping the car as stock as possible.

But then, if I'm keeping it "as factory" perhaps I should be keeping the connectors? Heck, should I have even kept the factory tape on?! No, I'm not that much of an obsessive purist ;) though I have to decide where my personal line in the sand is, regarding originality.
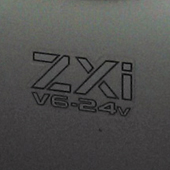
S

_________________
"Never tell me the odds!"

"I'm gonna need a bigger drive"

Image

'Butch' maint thread (BA 2.0 V6 ZXi SE). Daily. PM me for V6 Whatsapp Group
'Sundance' maint thread (BA 1.5 GXi). Having surgery
'The Bug' (BG 1.6GLXi). Lodger


Top
 Profile  
 
Dark_Jon
PostPosted: Sun Sep 28, 2014 8:17 pm 
Gold Member Offline
User avatar

My Car: Mazda 323F ZXi

Joined: Thu Sep 26, 2013 8:47 am
Posts: 349
Location: Sheerness (Kent)
Reputation: 11

if I remember correctly the fog light connectors are mounted on to the inside of the front bumper, just below/in front of the headlights. They're a pita because you have to un-clip them (mine are crazy stiff) to remove the front bumper. Why they mounted the main loom side connectors to the bumper and not the body work I have no idea :roll:

Jon


Top
 Profile  
 
SerenaJ
PostPosted: Sun Sep 28, 2014 9:01 pm 
Moderator Offline
User avatar

My Car: BG GLXi, BA '97 GXi, '98 ZXi

Joined: Tue Mar 13, 2012 2:12 am
Posts: 1644
Location: Reading
Reputation: 14

Dark_Jon wrote:
if I remember correctly the fog light connectors are mounted on to the inside of the front bumper, just below/in front of the headlights. They're a pita because you have to un-clip them (mine are crazy stiff) to remove the front bumper. Why they mounted the main loom side connectors to the bumper and not the body work I have no idea :roll:

Jon


Yes, seems daft! Thanks, I'll have a look next time I'm out there. Good to know where they are.

_________________
"Never tell me the odds!"

"I'm gonna need a bigger drive"

Image

'Butch' maint thread (BA 2.0 V6 ZXi SE). Daily. PM me for V6 Whatsapp Group
'Sundance' maint thread (BA 1.5 GXi). Having surgery
'The Bug' (BG 1.6GLXi). Lodger


Top
 Profile  
 
SerenaJ
PostPosted: Tue Oct 28, 2014 9:04 pm 
Moderator Offline
User avatar

My Car: BG GLXi, BA '97 GXi, '98 ZXi

Joined: Tue Mar 13, 2012 2:12 am
Posts: 1644
Location: Reading
Reputation: 14

About half the things I've bought for Sundance this week:

Image

The rest is already on the car 8)

Rough order of jobs will be interior clean (**** seeds everywhere that have come through the blowers), then mats, and front droplinks (weather permitting as parents' garage is still full of crap). Spoiler might get a rub down and respray, weather and real life permitting. And definitely an outside clean, I don't want to introduce it to club members next Sunday with it looking like an Oxfordshire cowshed :shock:

S

_________________
"Never tell me the odds!"

"I'm gonna need a bigger drive"

Image

'Butch' maint thread (BA 2.0 V6 ZXi SE). Daily. PM me for V6 Whatsapp Group
'Sundance' maint thread (BA 1.5 GXi). Having surgery
'The Bug' (BG 1.6GLXi). Lodger


Last edited by SerenaJ on Sat Feb 24, 2018 10:52 pm, edited 1 time in total.

Top
 Profile  
 
HughieW
PostPosted: Tue Oct 28, 2014 9:08 pm 
Website Admin Offline
User avatar

My Car: Mazda 323F

Joined: Fri Feb 13, 2009 9:33 am
Posts: 8421
Location: Corby
Reputation: 77

Sounds like you're gonna be busy!!

Quote:
I don't want to introduce it to club members next Sunday with it looking like an Oxfordshire cowshed


Does that mean I have to actually wash the Mazda 6 then?!?! :oops:

_________________
Image


Top
 Profile Facebook  
 
SerenaJ
PostPosted: Tue Oct 28, 2014 9:20 pm 
Moderator Offline
User avatar

My Car: BG GLXi, BA '97 GXi, '98 ZXi

Joined: Tue Mar 13, 2012 2:12 am
Posts: 1644
Location: Reading
Reputation: 14

Fortunately I only work in the office 1 day/week so I have plenty of opportunity to squander my homeworking time on the car before Sunday ;)

Quote:
Does that mean I have to actually wash the Mazda 6 then?!?! :oops:


You mean you don't do a full wash polish & wax on it every morning? I'm horrified. Sad. Let down :p

_________________
"Never tell me the odds!"

"I'm gonna need a bigger drive"

Image

'Butch' maint thread (BA 2.0 V6 ZXi SE). Daily. PM me for V6 Whatsapp Group
'Sundance' maint thread (BA 1.5 GXi). Having surgery
'The Bug' (BG 1.6GLXi). Lodger


Top
 Profile  
 
HughieW
PostPosted: Tue Oct 28, 2014 9:25 pm 
Website Admin Offline
User avatar

My Car: Mazda 323F

Joined: Fri Feb 13, 2009 9:33 am
Posts: 8421
Location: Corby
Reputation: 77

Part timer :lol: like I said in whatever that other thread was, bring a CV boot with you on Sunday and we'll replace your duff one :)

Haha the 6 gets a hose down every few months, when I can no longer see the reflection of my feet when I stand next to it! I do too many miles to bother cleaning it properly :lol:

_________________
Image


Top
 Profile Facebook  
 
SerenaJ
PostPosted: Fri Oct 31, 2014 6:52 pm 
Moderator Offline
User avatar

My Car: BG GLXi, BA '97 GXi, '98 ZXi

Joined: Tue Mar 13, 2012 2:12 am
Posts: 1644
Location: Reading
Reputation: 14

Cleaned car. Used photos on excellent forum guide (http://www.club323f.com/forum/viewtopic.php?f=19&t=32789) to get the trim out of the boot hatch and take off the spoiler for a respray. Chuffed that the whole trim & spoiler removal job only took me about 20 minutes, and I didn't break any of the trim getting it off :D

Trim off:

Image

Not as messy underneath as I expected:

Image

Holes need a bit of attention, though - a touch of rust has set in:

Image

All clean:

Image]

Holes covered overnight in case it rains again :roll:

Image

The damage along the back of the spoiler. The paint has deteriorated and rubbed off the edge over the years:

Image

Quite a lot of this as well - paint bubbling:

Image

An evening of spoiler prep beckons, hopefully respray tomorrow!

For the record (as it was difficult to describe without photos on my other thread), this is the underside of a pre-Ford spoiler with the blanking plate removed, and the recess where the 3rd brake light sits:

Image]

This is a proper Mazda spoiler with the name "Mazda" moulded into the underside with the part number (not visible on the photo, it was getting dark!)

Edit: NOTE: This pre-Ford spoiler only has one screw hole in the middle section (see photo). The post-Ford spoiler I bought has two screws there, not a single hole (I have just discovered, as I tried to fit the spare one I'd bought!) It must fit completely differently. Just in case anyone else is thinking of swapping pre/post Ford spoilers - check the fittings first.

_________________
"Never tell me the odds!"

"I'm gonna need a bigger drive"

Image

'Butch' maint thread (BA 2.0 V6 ZXi SE). Daily. PM me for V6 Whatsapp Group
'Sundance' maint thread (BA 1.5 GXi). Having surgery
'The Bug' (BG 1.6GLXi). Lodger


Last edited by SerenaJ on Sat Feb 24, 2018 11:11 pm, edited 4 times in total.

Top
 Profile  
 
BRV-6
PostPosted: Sat Nov 01, 2014 3:57 pm 
Offline

Joined: Mon May 13, 2013 9:34 am
Posts: 807
Location: Staffordshire
Reputation: 14

Nice work mate :D I broke loads of those clips the first time i had them off :roll: have a dinner folk i use now :lol:

Respraying the spoiler silver?


Top
 Profile  
 
SerenaJ
PostPosted: Sat Nov 01, 2014 6:29 pm 
Moderator Offline
User avatar

My Car: BG GLXi, BA '97 GXi, '98 ZXi

Joined: Tue Mar 13, 2012 2:12 am
Posts: 1644
Location: Reading
Reputation: 14

BRV-6 wrote:
Respraying the spoiler silver?


Cheers :D

Yes, repainting it 3L.

First attempt failed today: I spent all last night rubbing it down, then today masked up and undercoated, then began to spray base coat. Only then realised I hadn't got the surface smooth enough, there were sanding lines showing through the paint - so I'll have to rub it down with a proper sander, if I can get hold of one, and do it all over again :roll:

Fortunately it's only the top side. My only worry is sanding too much away, and changing the profile of the spoiler.

S

_________________
"Never tell me the odds!"

"I'm gonna need a bigger drive"

Image

'Butch' maint thread (BA 2.0 V6 ZXi SE). Daily. PM me for V6 Whatsapp Group
'Sundance' maint thread (BA 1.5 GXi). Having surgery
'The Bug' (BG 1.6GLXi). Lodger


Top
 Profile  
 
Dark_Jon
PostPosted: Sat Nov 01, 2014 11:16 pm 
Gold Member Offline
User avatar

My Car: Mazda 323F ZXi

Joined: Thu Sep 26, 2013 8:47 am
Posts: 349
Location: Sheerness (Kent)
Reputation: 11

You'd have to sand a heck of a lot to change the profile I think.

If you do have scratch marks or dents fill them rather than trying to sand them out, and use a knifing putty rather than normal filler as it's finer; Holts do one in a pale blue tube that I use. I also do it all by hand so you can feel an bumps or ridges, that and I find power tools can take off too much too quickly.

I then normally start with something like a 200 grit just to work any excess off and then level it all down with a 400, then 800 to a 1200 using a small circular motion. Also make sure to use wet and dry and plenty of water rinsing the paper often to clear blockage. If you can't use a circular motion (limited/tight space) follow the contour of the shape or flow of bodywork to help blend any sanding marks.

I also gently re-sand after priming, and again after a couple of colour coats with the finest wet and dry I have to flatten the paint off (ie remove any orange peel). Then its a final coat of colour or two then at least 3 layers of top coat (it's the lacquer that gives way more depth and gloss than a super smooth colour in my experience)

Once it's all dry you can use a cutting compound to really bring out the shine. T-Cut does pretty well.

It is time consuming, and it is a job that rewards patience. Took me two days to do two wing mirror covers :)


Top
 Profile  
 
SerenaJ
PostPosted: Sun Nov 02, 2014 12:27 am 
Moderator Offline
User avatar

My Car: BG GLXi, BA '97 GXi, '98 ZXi

Joined: Tue Mar 13, 2012 2:12 am
Posts: 1644
Location: Reading
Reputation: 14

Fantastic, thanks Jon - I'll print that out and take it with me into the workshop!

With paintwork as with many things I'm still finding my way. Really looking forward to the challenge of getting the spoiler back into good condition :D

S

_________________
"Never tell me the odds!"

"I'm gonna need a bigger drive"

Image

'Butch' maint thread (BA 2.0 V6 ZXi SE). Daily. PM me for V6 Whatsapp Group
'Sundance' maint thread (BA 1.5 GXi). Having surgery
'The Bug' (BG 1.6GLXi). Lodger


Top
 Profile  
 
SerenaJ
PostPosted: Fri Nov 14, 2014 4:42 pm 
Moderator Offline
User avatar

My Car: BG GLXi, BA '97 GXi, '98 ZXi

Joined: Tue Mar 13, 2012 2:12 am
Posts: 1644
Location: Reading
Reputation: 14

All the new stickers now on the car 8)

Image

Image

Image

The spoiler will be back, I'm still preparing it for the respray.

S

_________________
"Never tell me the odds!"

"I'm gonna need a bigger drive"

Image

'Butch' maint thread (BA 2.0 V6 ZXi SE). Daily. PM me for V6 Whatsapp Group
'Sundance' maint thread (BA 1.5 GXi). Having surgery
'The Bug' (BG 1.6GLXi). Lodger


Last edited by SerenaJ on Sat Feb 24, 2018 11:17 pm, edited 1 time in total.

Top
 Profile  
 
smurf182
PostPosted: Fri Nov 14, 2014 7:39 pm 
Gold Member Offline
User avatar

My Car: BA 1.5 Intrigue 'Womble'

Joined: Sat Jul 21, 2012 3:47 pm
Posts: 1929
Location: Redcar, Cleveland
Reputation: 20

very nice indeed, all the hard work is definately paying off 8)

_________________
https://imgur.com/aENfa44 Smurf182


Top
 Profile  
 
Lerch
PostPosted: Fri Nov 14, 2014 8:05 pm 
UK Events Manager Offline
User avatar

Joined: Tue May 10, 2011 11:16 am
Posts: 3061
Location: Coventry, West Mids
Reputation: 16

Nice work serena! Looking good!

_________________
"They wanna fingerprint me and gimme some years, they'll only get one finger while I'm shifting gears"


Top
 Profile Facebook  
 
BRV-6
PostPosted: Sat Nov 15, 2014 12:57 pm 
Offline

Joined: Mon May 13, 2013 9:34 am
Posts: 807
Location: Staffordshire
Reputation: 14

Oooo very nice 8)


Top
 Profile  
 
SerenaJ
PostPosted: Sat Nov 15, 2014 5:14 pm 
Moderator Offline
User avatar

My Car: BG GLXi, BA '97 GXi, '98 ZXi

Joined: Tue Mar 13, 2012 2:12 am
Posts: 1644
Location: Reading
Reputation: 14

Thanks chaps :)

Not a lot I can do now until the spring, as I have nowhere to work under cover (notionally I have a double garage, but that depends on it being cleared out first!!)

The primary job then is to properly repaint the sills, fill them with cavity wax and fit the new blanking plugs in the flute attachment holes.

If we get any cold, still days I'll attempt to repaint the spoiler :?

S

_________________
"Never tell me the odds!"

"I'm gonna need a bigger drive"

Image

'Butch' maint thread (BA 2.0 V6 ZXi SE). Daily. PM me for V6 Whatsapp Group
'Sundance' maint thread (BA 1.5 GXi). Having surgery
'The Bug' (BG 1.6GLXi). Lodger


Top
 Profile  
 
SerenaJ
PostPosted: Tue Dec 16, 2014 3:44 am 
Moderator Offline
User avatar

My Car: BG GLXi, BA '97 GXi, '98 ZXi

Joined: Tue Mar 13, 2012 2:12 am
Posts: 1644
Location: Reading
Reputation: 14

I picked up some leather seats at the weekend - finally I got family to clear the garage, so room to do some work after dark.

Finally under cover!

Image

Bit of a squeeze though - a brick pillar dangerously close on one side, and a pile of timber on the other. I had to climb out through the passenger door :?

Image

The seats (still with a couple of indent marks from where they were leaning against stuff last night). The camera flash makes the leather look shiny/uneven but actually it's all A1:

Image

I started by looking at the back seats. The felt on the backs has suffered a little over the years:

Image

... so I'm going to replace it with the black felt off the back of my existing seats, which is pristine, and somewhat thicker (it seems to be tougher/thicker material). Curiously these black leather seats have felt backing that's the same colour as my existing blue GXi interior! It must have been a particular shade of "Mazda" blue in their designer's colour palette. I'll salvage this felt by cleaning it and ironing it back into shape, and then fitting it to my existing seat backs before I sell them.

Quite a bit of light surface rust on the metal back, presumably because the seats were in storage for a while:

Image

At the right hand end of the above photo you can see one of the metal clips that held the leather stretched over the frame. I took them all out, as they were a bit rusty:

Image

Here's the leather peeled back to reveal the metal frame back, ready for cleaning:

Image

I'd come in from the garage by this time as it was 9pm and ****** freezing out there!

You can see in the above pic that the blue plastic studs that held the felt to the seat back are still in place - the holes in the felt were loose enough to take it off without removing these. I managed to ease them all out without breaking any, with a pair of needlenose pliers:

Image

The metal back after cleaning with sandpaper:

Image

One of these was handy as well, as I sliced my finger on the metal edge around the latch mechanism:

Image

My blood everywhere, and a little bit on the back of the leather. My car will now probably turn into Christine. BEWARE if you do this yourself, those metal edges might be 17yrs old but they're still razor sharp.

I replaced the old metal clips with small cable ties:

Image
Image

Rinse and repeat with the other half of the back seat tomorrow. Then I'll attach my existing backing felt onto both parts, and fit them into the car.

_________________
"Never tell me the odds!"

"I'm gonna need a bigger drive"

Image

'Butch' maint thread (BA 2.0 V6 ZXi SE). Daily. PM me for V6 Whatsapp Group
'Sundance' maint thread (BA 1.5 GXi). Having surgery
'The Bug' (BG 1.6GLXi). Lodger


Last edited by SerenaJ on Sat Feb 24, 2018 11:45 pm, edited 2 times in total.

Top
 Profile  
 
Howie
PostPosted: Tue Dec 16, 2014 7:52 am 
Gold Member Offline
User avatar

My Car: Noble Green ZXi

Joined: Sun Jan 13, 2008 10:01 pm
Posts: 1178
Location: Wilts / Dorset border
Reputation: 46

Great work. 8)
Look forward to seeing them fitted. :D

_________________
Image


Top
 Profile  
 
michalk1983
PostPosted: Tue Dec 16, 2014 8:49 am 
Offline
User avatar

Joined: Sun Dec 02, 2012 8:38 am
Posts: 28
Reputation: 1

You can try to remove these dents spots by heating and massaging them :)

Image

Tutorial video:


Top
 Profile  
 
Marc S
PostPosted: Tue Dec 16, 2014 2:17 pm 
UK Events Manager Offline
User avatar

My Car: 1st Gen RX7

Joined: Wed Mar 14, 2007 8:46 am
Posts: 13779
Location: "Rust?...I ain't got time to rust"
Reputation: 95

Now you have leather, treat yourself to some Gliptone leather conditioner, and some G Techniq L1 to top it ;)

_________________
Image

Paragon Auto Finishing
Professional vehicle detailing & valeting, specialising in paint correction and enhancement
Servicing, repairs, and undersealing also available
Discounts available for Gold Members :)


Top
 Profile Facebook  
 
SerenaJ
PostPosted: Wed Dec 17, 2014 6:22 pm 
Moderator Offline
User avatar

My Car: BG GLXi, BA '97 GXi, '98 ZXi

Joined: Tue Mar 13, 2012 2:12 am
Posts: 1644
Location: Reading
Reputation: 14

Marc S wrote:
Now you have leather, treat yourself to some Gliptone leather conditioner, and some G Techniq L1 to top it ;)

Cheers, I was wondering what was best to use on it! :D

michalk1983 wrote:
You can try to remove these dents spots by heating and massaging them :)

Excellent, thank you - I'll need something like that as there are a couple of prominent indentations which don't seem to be going away. I'll watch the vid & give it a go.

S

_________________
"Never tell me the odds!"

"I'm gonna need a bigger drive"

Image

'Butch' maint thread (BA 2.0 V6 ZXi SE). Daily. PM me for V6 Whatsapp Group
'Sundance' maint thread (BA 1.5 GXi). Having surgery
'The Bug' (BG 1.6GLXi). Lodger


Top
 Profile  
 
SerenaJ
PostPosted: Thu Dec 18, 2014 4:52 am 
Moderator Offline
User avatar

My Car: BG GLXi, BA '97 GXi, '98 ZXi

Joined: Tue Mar 13, 2012 2:12 am
Posts: 1644
Location: Reading
Reputation: 14

OK, day 2 of interior swap. Given that I now see this is a simple "bolt on, bolt off" job it probably shouldn't have taken this long, but it's the first time I've done it and I did need to do some clean-up.

The second seat back needed a rubbing down like the first:

Image

Good black felt from the existing seats removed for transfer to the back of the new leather ones:
Image
Image

The upright part of the rear seats has two sets of hinges, a set between the seat backs which is fixed to the car (pic below), and one hinge attached to the outer end of each seat back. I took the bolts out of the ones in the middle, releasing the seats (the brown metal triangles are the fixed hinges, the seats are underneath; you can just see the holes in the metal seat frame lining up under the hinges):

Image

Then I realised that to unbolt the hinges attached to the outer ends of the seats I'd have to take the bolsters out first, as they were blocking access. Cue discussion (http://www.club323f.com/forum/viewtopic.php?f=4&t=58548) about how I was supposed to get them out. I finally spotted the bolt that held in the bolster, which was easily accessible below it:

Image

... after that the bolster lifted out with minimal effort. All that held it on was the bolt, and a clip in the middle (just visible on the left of the photo) that slides into a bracket:

Image

I took out the second bolster, unbolted the hinges on the outer ends of the seats from the car body and the rear seat backs were free, and the back of the car now completely seatless. It was it this point that besides a mass of cobwebs behind the boot trim(!) I spotted a bulge in the white sealant in the corner by the front end of the wheel arch, dug a penknife into it and discovered this :shock: :

Image

In case it's not clear where this is located, the top of the picture points towards the back of the car; the bulge in the metal is the offside rear wheel arch. The lip on the left is the inside of the rear door sill.

Putting my hand under the wheel arch outside and pressing both sides of the rust patch at the same time, I could detect a very slight flex in the metal at that spot, where the rust had weakened it - it was the same in the identical corner on the other side of the car. So a silver lining of swapping the interior was discovering ongoing rust that hopefully I've caught just in time. At least, I jabbed the penkife hard into the rusty area and it didn't go through. Another year or two of that and I'd probably have a hole. It seems to be a particular weak spot in the body shell design, as the rust is confined to a very small corner area and identical in location and extent on the other side. I cleaned up both of them and Hammerited them on the interior side (rust killing paint), though I'll have to clean out the rear wheel arches sometime soon and deal with that area of the exterior side. As the metal was starting to flex, I might add a patch of that strengthening material available for bodywork repairs, just to make sure that's the end of it.

:!: So if anyone else has the interior out of their BA, check those corners on either side while you're at it! That white sealant that Mazda lathered everywhere on the seams masks rust horrors, if you don't look very carefully for suspicious bulges in it (I discovered this on one of the doors as well: white sealant masking rust).

After that nasty surprise it was time to clean up the fixing loops on the new leather bolster, which had quite a lot of surface rust. They were sanded and Ku-rusted, just to be thorough.

Image

New leather bolster in place:

Image

Time to put the leather rear seat backs in. I put the floor mats underneath to protect the leather from any scratches or indentations from the seat pan:

Image

I checked underneath the rear kick plates at the same time - all perfect on both sides, fortunately, although filthy (pic below after I cleaned it). Amazing, as water clearly seeps in under the outside edge.

Image

I bolted the outer hinges onto the car body first (the ones that stay attached to the seat backs), then realised that this pin on the fixed hinges in the middle of the car was supposed to be slotted into the inner end of the seat first:

Image

... so I had to unbolt everything, insert the pin, and then redo the bolts.

The last job was to slide in the bottom seat cushion. Voila! Back of the interior all done.

Image

The floor carpet seems to be a bit darker than Jon's (and it's darker than it looks in the photo), it goes really well with the black leather so I don't think I'll need to swap it.

After this I spent the last 90 minutes of daylight trying in vain to get the bolts out of the front seat mountings. Looks like a trip somewhere to get a socket extension bar tomorrow :roll:

_________________
"Never tell me the odds!"

"I'm gonna need a bigger drive"

Image

'Butch' maint thread (BA 2.0 V6 ZXi SE). Daily. PM me for V6 Whatsapp Group
'Sundance' maint thread (BA 1.5 GXi). Having surgery
'The Bug' (BG 1.6GLXi). Lodger


Last edited by SerenaJ on Sun Feb 25, 2018 12:11 am, edited 1 time in total.

Top
 Profile  
 
Display posts from previous:  Sort by  
Post new topic Reply to topic  [ 412 posts ]  Go to page Previous  1, 2, 3, 4, 5 ... 14  Next

All times are UTC [ DST ]


Who is online

Users browsing this forum: No registered users and 7 guests


You cannot post new topics in this forum
You cannot reply to topics in this forum
You cannot edit your posts in this forum
You cannot delete your posts in this forum
You cannot post attachments in this forum

Search for:
Jump to:  

Protected by Anti-Spam ACP Powered by phpBB® Forum Software © phpBB Group
Karma functions powered by Karma MOD © 2007, 2009 m157y